Buffalo Wings can be tricky at home. You pull the pan from the oven and they look golden, but the skin is still a little flabby and the sauce slides right off. I’ve been there, and I used to think deep frying was the only path to crispy bliss. Then I learned a simple oven method that turns out shatteringly crisp wings without a pot of oil or a smoky kitchen. Today I’m walking you through exactly how I do it, with easy steps, a few smart tricks, and zero fuss. If you love saucy comfort food, you might also enjoy this cozy spin for busy nights: Buffalo chicken and cheese casserole.
How to make Ultra Crispy Buffalo Wings in the Oven
Let’s jump straight to the good stuff. The secret to crispy wings in the oven is getting the skin as dry as possible, giving it a tiny lift off the pan, and using steady high heat. Here is my reliable method that never fails.
Step 1: Pat dry. Grab paper towels and blot the wings until they feel dry to the touch. Moisture is the enemy of crispiness. If you have time, set them uncovered in the fridge for 30 to 60 minutes to air dry even more.
Step 2: Baking powder trick. Toss the wings with a light sprinkle of baking powder and salt. I use about 1 teaspoon baking powder per pound of wings, plus 1 teaspoon kosher salt. Baking powder raises the pH of the skin so it browns and crisps beautifully. Make sure it is baking powder, not baking soda.
Step 3: Rack and pan. Line a rimmed sheet pan with foil for easy cleanup, then set a wire rack on top. The rack allows hot air to circulate all around each piece, which is huge for getting that evenly crisp finish.
Step 4: Roast on high, then higher. Start at 425°F for about 35 minutes, flipping halfway. Then crank to 450°F for another 10 to 15 minutes until the skin looks bubbly and deep golden. Every oven runs a little different, so keep an eye near the end.
Step 5: Sauce last. Toss the piping hot wings in your favorite sauce after baking. If you sauce too early, you’ll soften the skin. I like a mix of hot sauce and melted butter, plus a touch of honey for balance.
Step 6: Rest a minute. Give them a quick 2 to 3 minute rest on the rack so extra sauce drips off and the coating sets. Then serve right away while the skin is still audibly crisp.
“I tried the rack plus baking powder trick and my wings were the crispiest I’ve ever made. My picky teenager kept asking if I secretly fried them.”

What you need for Crispy Baked Buffalo Wings
You don’t need special gear, just a few helpful tools and pantry staples. Here is the basic lineup I use for a no-stress cooking session.
- Chicken wings: Split into flats and drumettes, tips removed if attached.
- Baking powder: Aluminum-free is nice, but regular works fine.
- Kosher salt and pepper: Season the skin before baking.
- Garlic powder or onion powder: Optional for a savory base.
- Hot sauce: Frank’s Original is classic, but any cayenne hot sauce works.
- Butter: Unsalted melted butter for the sauce. Add honey for a mild sweet finish.
- Sheet pan and wire rack: This combo is key for airflow and crisp edges.
- Foil or parchment: For easier cleanup under the rack.
- Tongs: To flip and toss without burning your fingers.
Flavor play: If you like a smoky kick, whisk a pinch of smoked paprika into your sauce. If you prefer extra heat, add cayenne or a dash of chipotle. Want a creamy side? Stir together Greek yogurt, lemon juice, and minced garlic for a fast dip. And if you end up with extra cooked chicken, consider sliding it into an easy weeknight bake like this cheesy buffalo chicken casserole. It’s a smart way to repurpose leftovers into a comforting meal.
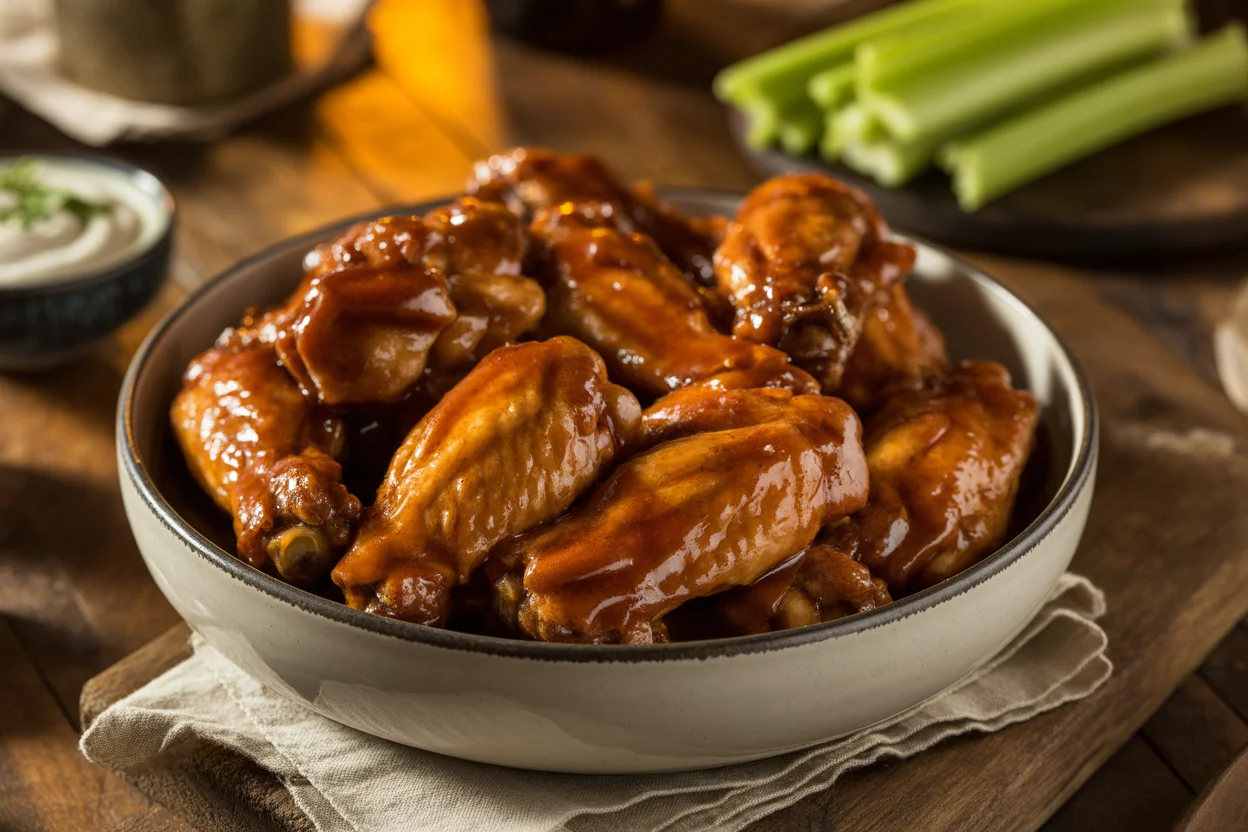
Super Crispy BAKED Buffalo Wings!
If you love that restaurant-level crunch but want to keep it simple at home, this is where the technique shines. Dry skin, a light coating of baking powder, a rack, and hot air do all the work. No deep fryer, no mess. A few extra details can make your batch top-tier:
Dry brine for deeper flavor. Salt the wings and let them sit in the fridge uncovered for a few hours or overnight. The salt seasons the meat, draws out moisture that later evaporates, and helps the skin crisp faster in the oven.
Don’t crowd the pan. Space each piece out so air can move freely. If pieces touch, that spot stays soft. Two pans are better than one if you are cooking for a crowd.
Sauce balance. My go-to ratio is 1 part melted butter to 1.5 parts hot sauce, with 1 to 2 teaspoons honey per stick of butter for roundness. Whisk until glossy, then toss hot wings quickly so the coating grabs onto the crackly surface.
Finish with a quick blast. If your oven has convection, flip it on for the last 5 minutes to turbocharge the crisp factor. Fan or not, letting them rest on the rack for a minute after saucing helps keep the exterior snappy.
Serving ideas: Blue cheese dressing is classic, but ranch or garlic yogurt dip both hit the spot. Pile on sliced carrots, celery, and crisp romaine. For a full game day spread, keep a warm pan of make-ahead buffalo chicken bake on the side for anyone who wants less heat.
History of Buffalo Wings
It all started in Buffalo, New York in the 1960s. The most popular story points to the Anchor Bar, where the owners tossed leftover wings in hot sauce and butter for a late-night snack. It caught on with locals, then slowly spread across the country through taverns and sports bars. TV and football Sundays helped turn them into the go-to party food we know today. Over time, cooks played with different flavors like garlic parmesan, lemon pepper, and sweet chili, but that tangy hot sauce plus butter combo still defines the original.
Preparation tips for perfect Buffalo Wings
- Trim and pat dry: Any moisture left on the skin fights crispy texture. The drier, the better.
- Use a rack: Airflow underneath is half the secret. No sticking, no soggy bottoms.
- Season smart: Salt before baking. Sauce after.
- Heat management: Roast hot and finish hotter. Flip once for even browning.
- Toss fast: Wings should be sizzling when they hit the sauce. The heat helps the sauce cling.
- Serve immediately: Crispness fades as they sit. If you must hold them, keep them on the rack in a low oven, then sauce right before serving.
- Cleanup hack: Line the pan with foil and spritz the rack with oil spray for easier scrubbing.
Common Questions
Can I bake wings from frozen?
Yes, but you will not get the same crisp skin. Thaw first in the fridge for 24 hours, then pat dry. If you must cook from frozen, add extra baking time and expect a softer finish.
Is baking powder safe to eat on wings?
Absolutely. Use a small amount and make sure it is baking powder. The heat neutralizes its flavor and it helps produce a crispy crust.
What sauce should I use if I do not like too much heat?
Try half hot sauce and half barbecue sauce, plus a little honey. Or go with garlic parmesan by tossing in melted butter, grated parmesan, garlic, and parsley.
How do I reheat without losing crisp?
Place wings on a rack over a sheet pan and reheat at 400°F for 8 to 12 minutes. If already sauced, reheat dry and toss with a fresh spoonful of sauce right before serving.
Any good way to use leftover chicken?
Chop it and stir into mac and cheese or tuck into sliders. For an easy dinner that still hits those spicy notes, try this comforting buffalo chicken and cheese casserole.
Ready to Bake Up a Crispy Batch?
There you have it, my trusty, fuss-free way to get truly crisp wings in the oven with simple ingredients and a few smart moves. If you are ordering for game night instead of cooking, you can always grab delivery from Buffalo Wild Wings to keep everyone happy. Curious to dive deeper into an expert oven method I admire, this ultra crispy baked wings guide lays it out with clear steps. I hope these tips help you make a batch that disappears fast and gets a little applause at the table. Now preheat that oven and let’s cook something delicious together.